Availability: The Omni-Channel AI Bot is a paid add-on (fixed monthly fee where applicable, plus usage-based charges). To know the pricing details, please reach out to your account POC or email at kcs@gokwik.co
Why It's Worth Setting Up
✓ Go live fast — no engineering ticket required — a guided wizard takes you from zero to live.
✓ One setup, every channel — configure once, answer consistently on WhatsApp, Instagram DM, and Facebook Messenger.
✓ Fewer tickets — the bot resolves common questions automatically, so agents focus on what really needs a human.
✓ Always on-brand — your tone and topics to avoid shape every reply, so it always sounds like you.
✓ Gets smarter over time — correct it from your inbox and it learns for your store.
✓ Accurate order help — connect your logistics provider and the bot shares real-time tracking with shoppers.
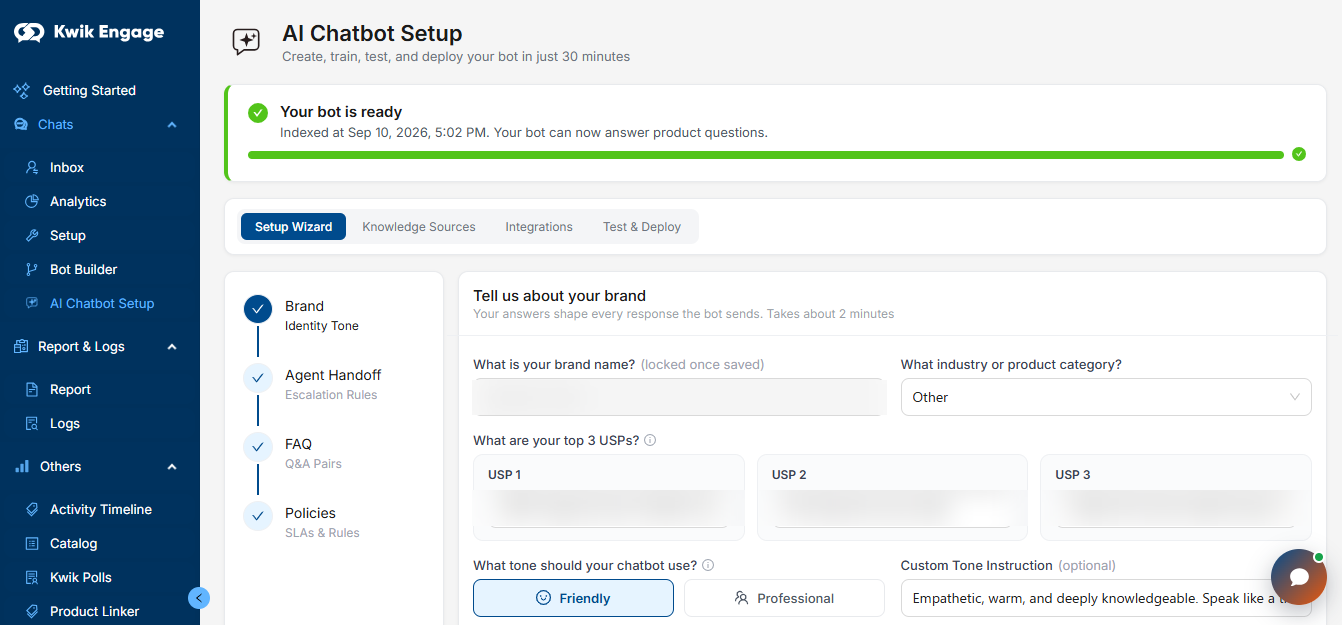
✓ Navigate — in the left navigation panel, go to Chats → AI Chatbot Setup.
✓ Header — the page header reads “AI Chatbot Setup — Create, train, test, and deploy your bot in just 30 minutes.”
✓ Status banner — a status banner up top shows readiness, e.g. “Your bot is ready — Indexed at [date/time]. Your bot can now answer product questions,” with a progress bar.
✓ Four tabs — four tabs run across the top — Setup Wizard, Knowledge Sources, Integrations, and Test & Deploy — covered next, step by step.
Five quick inputs that shape everything the bot says.





✓ Talk to a human — is always on and can't be turned off — if a customer asks for a person, the bot always hands off.
✓ Presets — switch on ready-made triggers like Complaint or Escalation.
✓ Custom scenarios — add your own trigger phrases as free text.
✓ Full context — handoffs carry the full chat history, so your agent doesn't make the customer repeat themselves.
✓ Starter set — 6 starter questions are suggested automatically based on your industry.
✓ Fully editable — keep, edit, or delete any suggested FAQ; add new ones anytime.
✓ Delivery windows — minimum delivery days, maximum delivery days, and maximum shipping days — all in days.
✓ SLA alerts — a missed delivery window automatically triggers an SLA alert for you.
✓ Return / exchange — set your window (default 7 days) and any eligibility conditions.
✓ Cancellation — choose Not Allowed, or Allowed — before fulfillment OR within X days of ordering — for all orders or COD only.
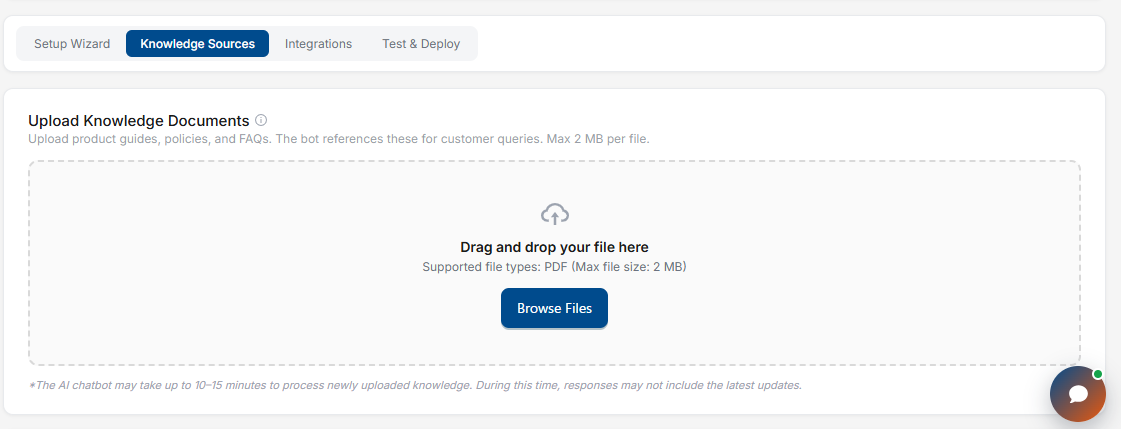
✓ Processing time — newly uploaded files take 10–15 minutes before the bot starts using them.
✓ How it's used — the bot cites these documents when answering customer questions.


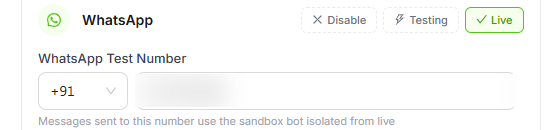
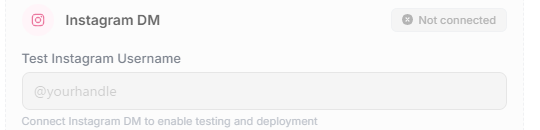
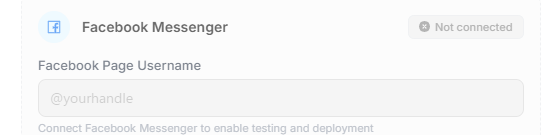
✓ Same control everywhere — every channel — WhatsApp, Instagram DM, Facebook Messenger — uses the same Disable / Testing / Live toggle.
✓ Isolated sandbox — messages sent to your test number/handle never reach real customers — it's a safe sandbox.
✓ Your pace — go live on one channel at a time, whenever you're confident — no need to launch all three together.
✓ Coming soon — Email and Web Chat are planned for a future update.
✓ One-click correction — every AI reply in your Inbox has a “not quite right?” option — open it on any reply that needs correcting.
✓ What you can fix — fix or add information the bot didn't know, correct a wrong fact (e.g. an outdated delivery estimate), or change how it responds (e.g. always ask for an order number first).
✓ It learns — the bot gets sharper for your store the more you use and correct it.
✓ Create logins — go to Setup → Agents in the left panel to create a login for each team member.
✓ Scoped access — agents get access limited to the Chat/Inbox panel.
✓ Where handoffs go — this is where the handoffs from Step 2 actually land — set this up before you go live.
See It In Action
✓ Live the same day — a new merchant sets brand voice, handoff rules, FAQs, policies, and logistics through the wizard, tests in the sandbox, and takes WhatsApp live the same afternoon.
✓ Same answer, every channel — one customer asks on Instagram, another on WhatsApp — the bot answers both the same way, in your tone, with live tracking.
✓ Bringing in a human — the bot recognizes an escalation phrase, hands off to an agent with full context, and the customer never has to repeat themselves.
✓ Correcting in seconds — an agent spots the bot quoting an outdated delivery estimate, opens Guide Your AI Expert, corrects it, and the bot stops repeating the mistake.
Common Questions
Q: How long does setup take?
A: About 30 minutes for a catalog of about 100 products, end-to-end — wizard, knowledge upload, logistics, and testing.
Q: Which channels can I go live on?
A: WhatsApp, Instagram DM, and Facebook Messenger today. Web Chat and Email are planned for a future update.
Q: Can I control when it hands over to a human?
A: Yes. In Agent Handoff, choose which situations escalate. Talk to a human is always on; add your own scenarios too.
Q: What if the bot answers something incorrectly?
A: Open “not quite right?” on that reply and tell it what to change. Your correction trains the bot for your store.
Q: Do I have to enter my policies twice?
A: No. Policies auto-fill matching FAQ answers — what you set once is what the bot tells customers.
Q: Can I test before going live?
A: Yes — a sandbox separate from your live bot, plus a Disable / Testing / Live control on every channel.
You're Ready to Launch ?
Run through this checklist before you switch your bot to Live:
For detailed step-by-step guidance you can refer to this: Setting Up an AI Chatbot on the KwikEngage Panel
Was this article helpful?
That’s Great!
Thank you for your feedback
Sorry! We couldn't be helpful
Thank you for your feedback
Feedback sent
We appreciate your effort and will try to fix the article